In order to deposit funds and trade with them on our platform it is necessary to verify your email address first and complete the KYC (Know Your Customer) verification process. KYC and AML (Anti Money Laundering) procedures have become the standard ones in most financial institutions and cryptocurrency trading platforms.
KYC is a procedure required by the regulatory bodies and laws in order to verify the identity of cash handlers and on our platform, it is fairly easy to go through. Here you may find a convenient step-by-step walkthrough of how to complete the KYC verification process.
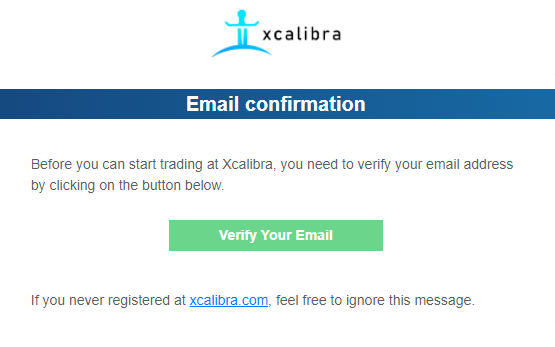
Log into your Xcalibra account. Upon logging in you will see the blinking indicator in the upper right corner informing you to check your inbox and verify your email address. If you are not able to locate the verification email in your inbox, you may request another one.
Once you receive the confirmation email, please click on the Verify Your Email button to confirm your registration.
After you have confirmed your email, the email icon will turn green, and the KYC0 icon will start blinking. In order to complete this level of KYC, just click on the blue button KYC VERIFICATION and follow the steps.
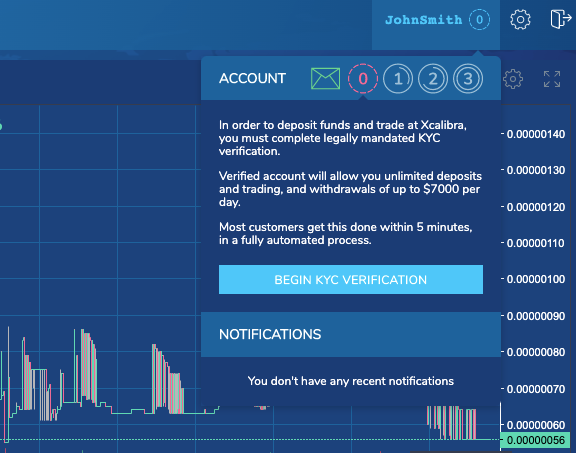
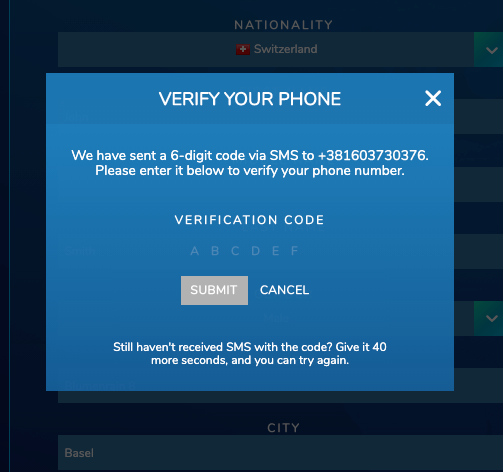
You will be presented with another blue button saying BEGIN KYC VERIFICATION, and you should click this button as well. In order to request KYC verification, you will be asked to fill in the necessary information, including the name, surname, nationality (the country from which you register), date of birth, name, and postal code of the city in which you reside and your phone number.
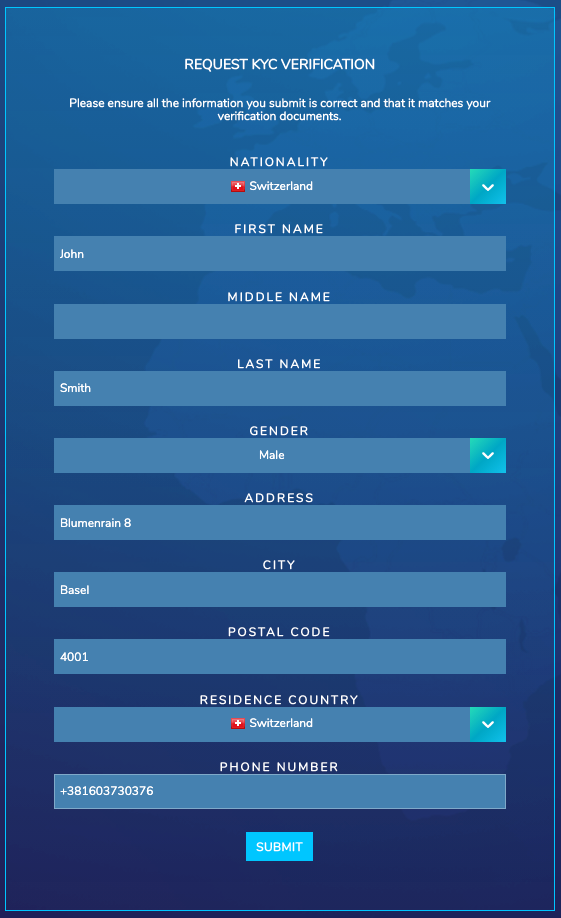
When you click SUBMIT button at the bottom of this form, you will be asked to enter a six-digit code that you have received in an SMS.
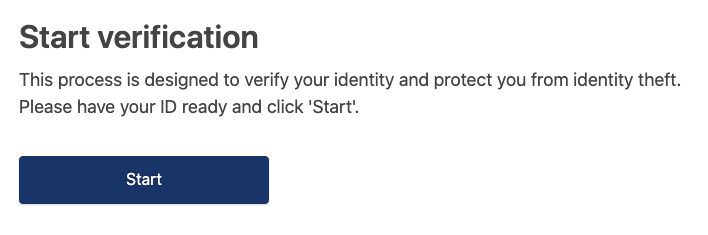
In order to start the Verification, please click START when you see this window.
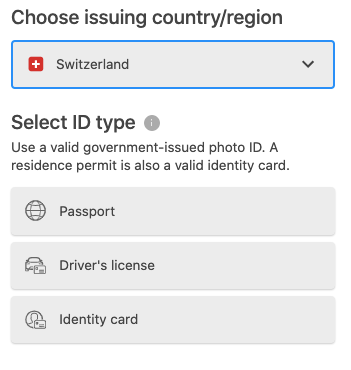
You will be asked to submit photos of a personal document that confirms the veracity of the information you have previously entered. You shall take a photo of the front and back of the ID card and upload it to the provided fields. It is important that the photo is good quality, well lit and that your face is clearly visible, as well as all the data in your document (name and surname, nationality, date of birth, and MRZ code). That code is on the back of the ID card and that is why it is necessary to take a picture of that part and attach it to the form.
You can also enclose a photo of your passport as a verification document, and in this case, you will only need to photograph the first page because it contains all the necessary information.
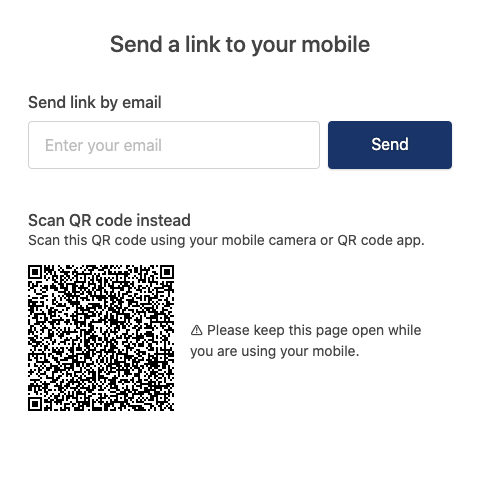
For the following steps of the verification process it may be more convenient to use a mobile device, and if you decide to do so please select the option Prefer to use your mobile.
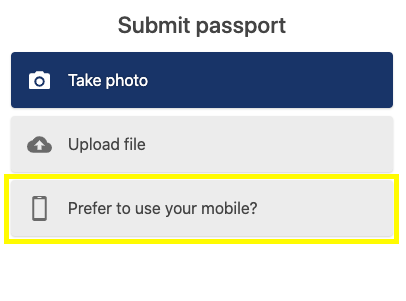
Then, you will be given a QR code to scan or you can enter your email address again to get the link for further steps.
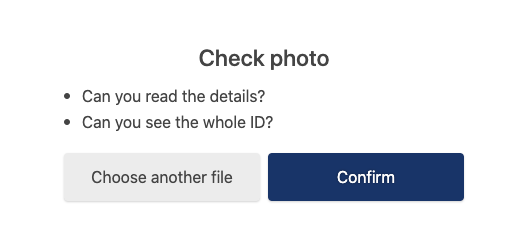
After you have uploaded the photo of your document you will be asked to review it and confirm the upload.
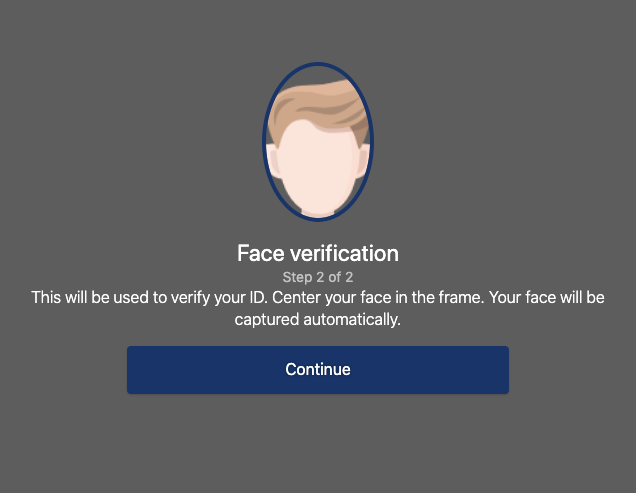
Upon clicking Confirm your browser will request access to your camera in order to take a photo of your face.
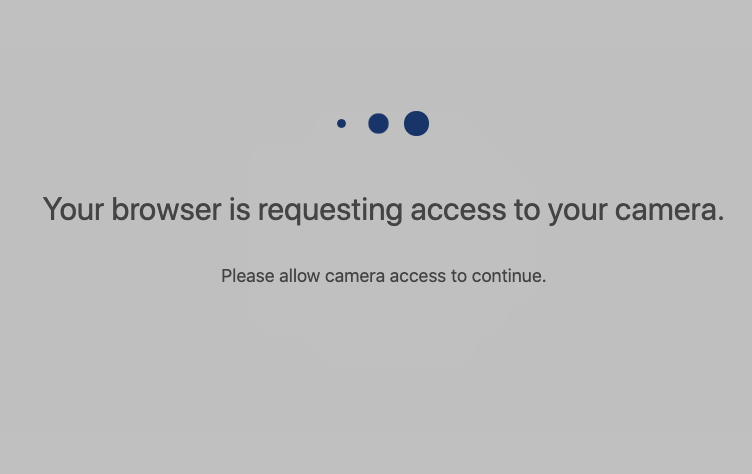
You shall grant access to your camera, and follow the instructions for taking a photo.
When you have provided all the necessary data, your information will be reviewed and your account verified as an Advanced account.